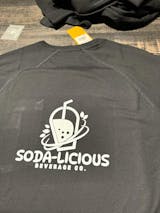
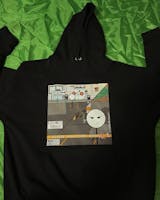
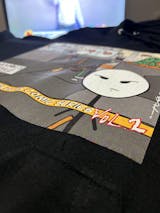
Creating unique prints in the DTF Transfer Printing process is important and will take you forward. There are steps to follow to create unique print. Create unique prints by creating original and personalized designs. You can create your own drawings or digital artworks using graphic design programs. However, TF printing allows you to create custom colors and color gradients. Create unique designs using the colors and effects you want.
Try different designs on different products such as t-shirts, t-shirts, hats, bags, pillow cases. You can achieve unique and remarkable results by placing your designs in different sizes and locations. For example, you can make a difference by simply extending the printing to a corner or around the product. TF printing allows you to apply your designs in multiple layers. In this way, you can create more complex and in-depth designs. Intricate designs add originality.
Feel free to push the limits with DTF print transfer. Discover new and creative designs using trial and error. Creative designs are an important test for unique prints. Stay on trend, but also add your own unique twist. In this way, you can create original and unique designs that suit your own style.
Preparing Drawings for Printing Transfer Process
It is important to prepare the drawings for the print transfer process. People want to convert their own drawings into transfer prints. To professionally convert this step to print, you need:
Create Quality Drawings: The most important step for a professional DTF print transfer is to create quality drawings. These drawings must be created in a vector-based graphic design program (for example, Adobe Illustrator). Vector artwork does not lose quality when scaled to any size.
Keep the resolution high: The resolution of the drawings to be used for DTF printing is very important. 300 DPI (dots per inch) resolution improves print quality. Use the correct resolution settings in your design program.
Color Profile and Color Accuracy: A color profile ensures that your design prints in the correct colors. For color accuracy, you should use the CMYK (Cyan, Magenta, Yellow, Key/Black) color mode. Consider the color difference between the display's RGB (Red, Green, Blue) mode and the CMYK mode used in printing.
Adjust the dimensions of the design: Adjust your design to match the final print size. Determine which sizes are best suited for DTF print transfer and adjust your design to those dimensions.
Cutting Lines and Layers: In DTF printing, you can add cut lines and layers to highlight or cut specific design parts. This makes the design look more professional and original.
Fonts and Fonts: If you are designing with text, choose appropriate fonts and fonts. Be aware of font licensing issues and ensure that text is legible.
Negative and Positive Fields: Distinguish between negative (blank) and positive (fill) fields in your design. This will help your design turn out the way you want it to.
DTF Printer Settings: Learn the features and settings of your DTF printer. Configure the printer settings correctly before you print your drawing.
DTF Film Printing: Print your ready-made drawing on DTF film. Check the print quality and make adjustments as needed.
Transfer Process: Combine the printing with the DTF transfer film and transfer it to the final product using a heat press machine. Ensure a quality transfer by making the correct temperature and time settings.
Ink Use for High Quality DTF Print Transfer
In DTF printing transfer, ink quality is very important to get prints with vibrant colors and a quality appearance. It is necessary to choose ink suitable for DTF Print transfer and machine. A good ink provides vibrant colors and clear drawings. It is important that color transitions and tones are smooth and accurate in DTF printing. Quality inks convey color transitions and tones smoothly. Color profile and calibration settings should be taken into consideration to ensure that the colors in the design appear as you want in the print, along with the ink.
